

A couple years ago, I discovered Poshmark. That was such an exciting time for me, because I had loads of clothes I rarely wore, but I didn’t have an outlet to sell them. Craigslist wasn’t made for selling your old clothes, and a garage sale wasn’t going to bring in the dough I was looking for.
I went through my closet and discovered I had some high-value bags, shoes, jewelry, and garments. I got to work.
2 years later, and I have made over $1,500 selling my things in my spare time. For the amount of work I actually put into this side hustle, that’s not bad! I now want to pass some of that knowledge onto you, so that you can enjoy fashion sustainably and make some extra money on the side.
Step 1: Set Up Your Profile on a Re-Sell App
There are a ton of apps out there for clothing re-selling. I prefer to use Poshmark, so that’s what I’ll be talking about on this post. However, if you’re already using a different app, most of this will still apply to you!
Setting up is simple. Download the app and create your profile. Apps like Poshmark encourage members to follow and share new member’s profiles, so it’s easier to make connections. Without putting ANY effort into my follower count, I have amassed over 3,000 followers in 2 years. They make it easy!

Step 2: List Your First Item
Time to create your first post! Choose an item to sell, and hit the “sell” button on your app. Poshmark will have you take some photos of the item. I don’t think the photos need to be amazing, but the better they are, the better the chance of making a sale. Many poshers will put a white rug behind their photos to give a nice background. As long as you show off what the item really looks like, you shouldn’t have a problem.
After you take some photos, Poshmark will ask for some other information. Let’s go through that list:
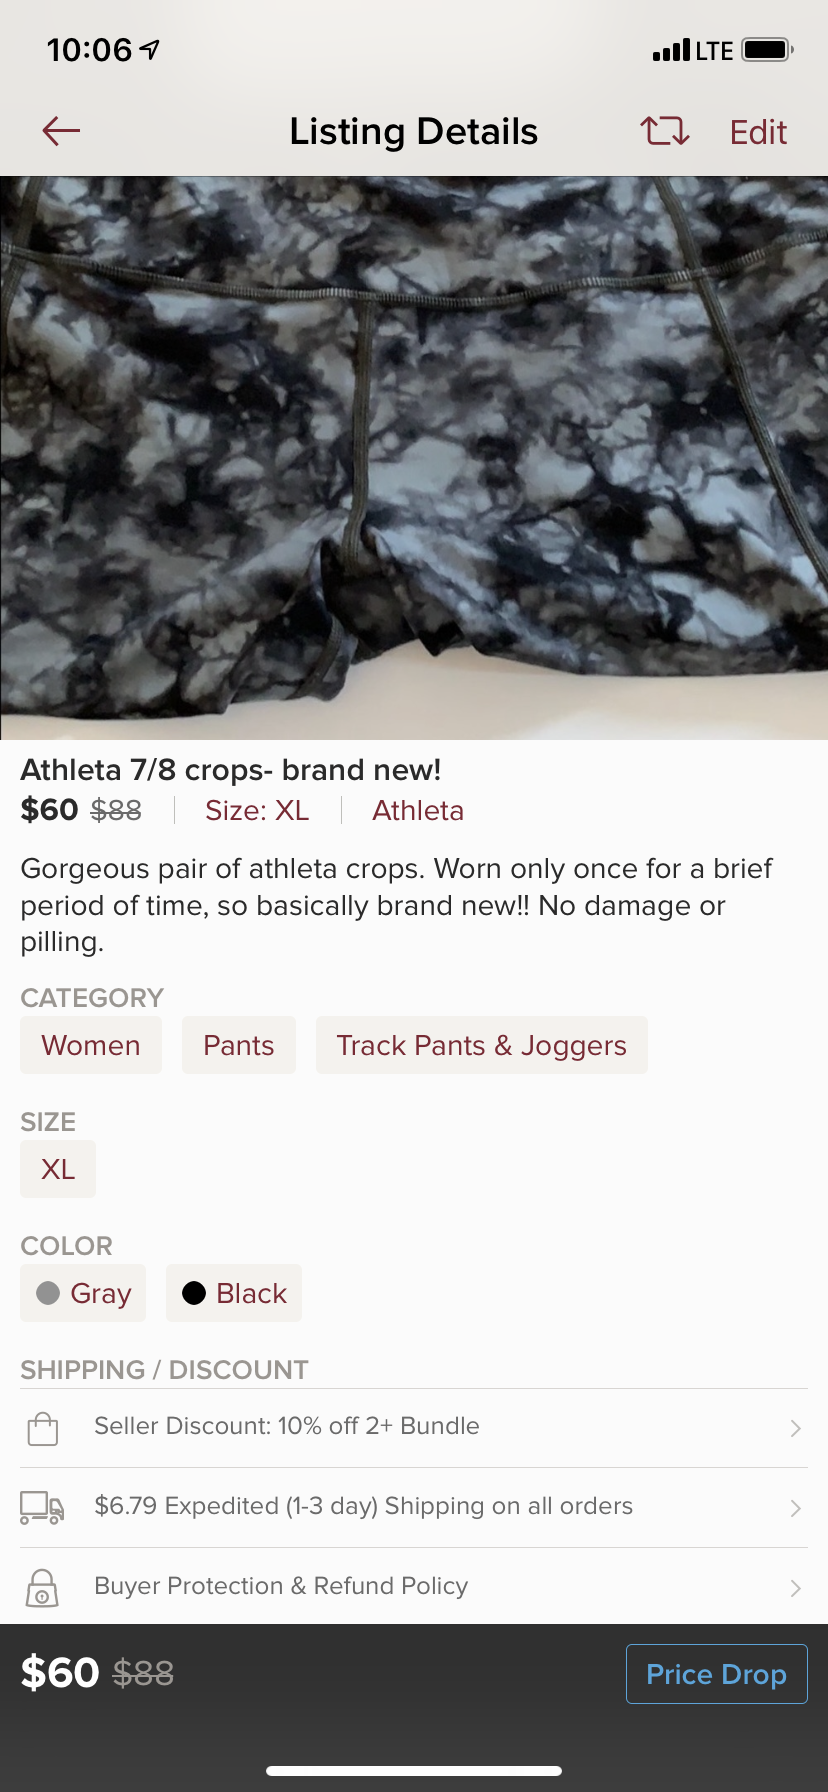
- What are you selling= A title for your post. Make this fun and eye-catching (emojis are a YES).
- Describe it= Add a description for the item. I usually include exactly what I’m selling, the condition it’s in, the size (if I’m feeling fancy). Include as much description as possible to avoid follow-up comment questions later.
- Category= What type of item you’re selling
- Quantity= How many of this particular item you’re selling
- Size= Size of garment
- Brand= Name of brand
- Color= Color
- New With Tags= If the tags are still on, mark this as yes! Otherwise, you can ignore
- Original Price= How much you paid for it (an estimate is fine)
- Listing Price= The price you’re trying to get
- Earnings= How much you will make after Poshmark takes it’s cut
Let’s take a look at an example listing of mine (still for sale, BTW!)

Once you list your new item, you will be surprised at how quickly you get likes and comments. Other poshers are also encouraged to ‘share’ your item, which helps it sell faster!
Step 3: Posh Parties
Posh Parties are real-time virtual shopping events when sellers can share or list items within a specific category (i.e. Athletic Wear). When I was just starting, I would share ALL applicable listings within a party. This definitely takes some time, since you have to share one by one, and there can be up to 3 parties in a day. However, I did make a ton of sales! Try your hand at sharing your listings here to make some sales (and maybe even find some fun buys!)
Step 4: I Made a Sale, Now What?
Congrats! Your first sale is HUGE. Once you’ve sold, you want to ship it as soon as humanly possible to keep your stats up (we’ll cover these next!). Print the label that Poshmark emails to you, then package your item with shipping label. Want to be an ahhh-mazing Posher? Add a little note, use tissue paper, really anything to make the package prettier for your buyer. Each buyer will be rating the seller, and you don’t want to lose any stars. This is not a requirement, but definitely a way to help you stand out and hopefully gain some repeat business! Just drop this off at your nearest post office as a pre-paid package (no standing in line!) and you’re all set.
Step 5: Posh Stats

There are a ton of helpful tools in the menu section of your app. The one I love the most is the ‘Posh Stats’ portion.
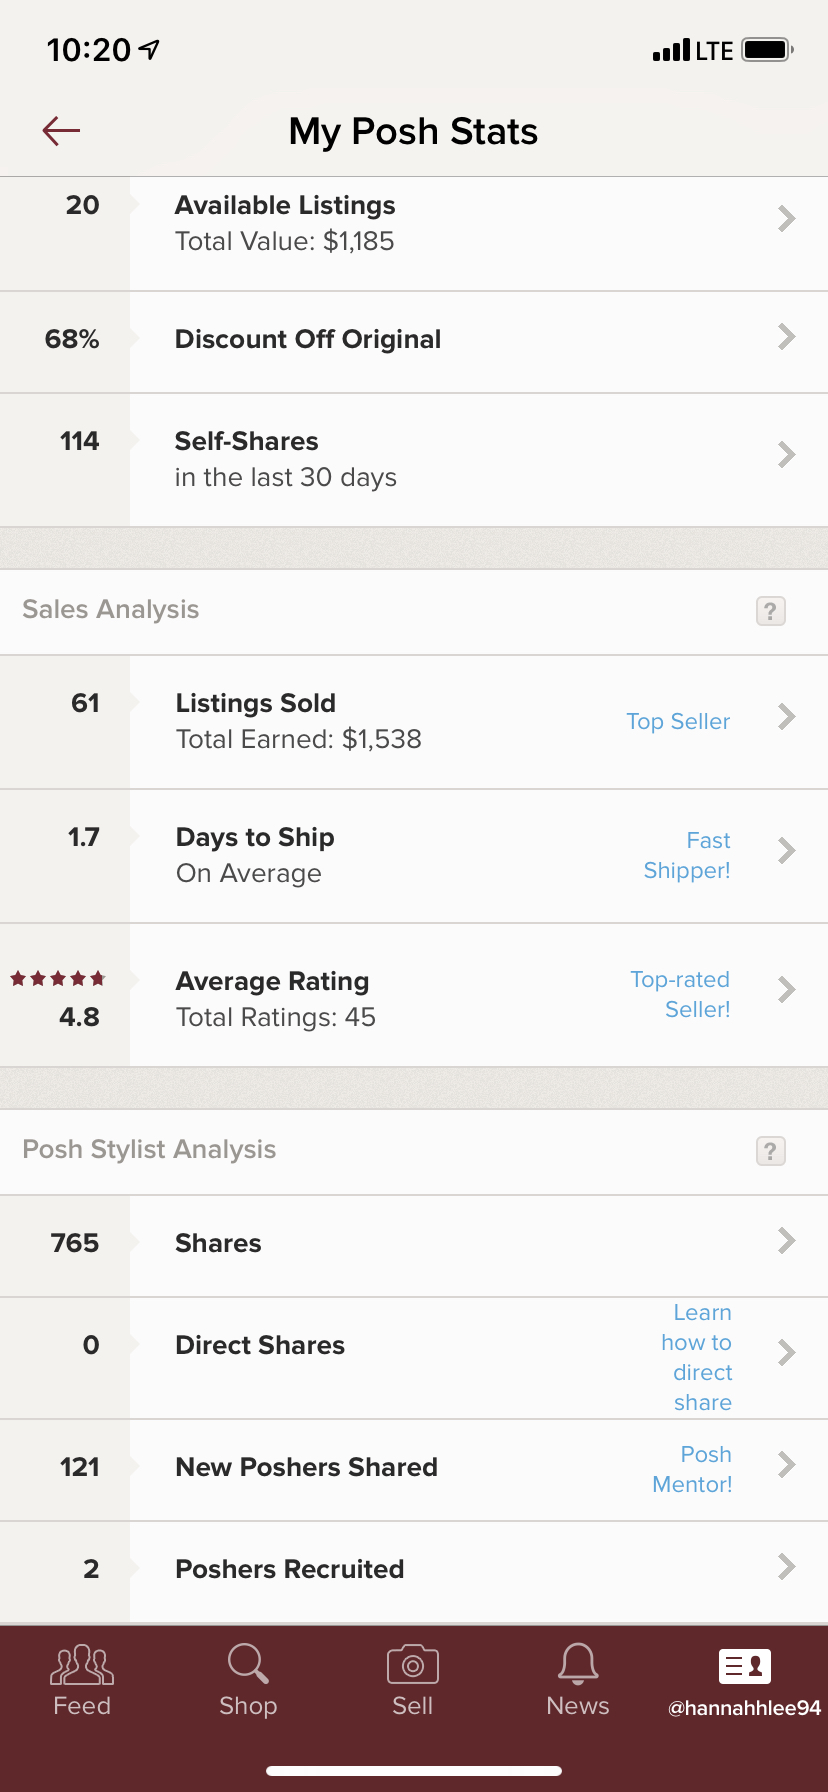
When you’re just starting out, you won’t have much here. However, once you begin selling everything in your closet, these will grow and help you along the way. The most important ones to keep in mind are the average rating, days to ship, and total listings sold (and earned $$$).
The higher your rating, the more Poshmark will share your profile with other members, thus resulting in new sales. Plus, if you don’t have a great rating, other members may not want to buy from you. So keep this rating UP!
Days to ship is also an important one. Other poshers can see this on your profile, and if choosing between poshers to shop with, may choose someone else if they ship faster. If you ever have a problem shipping something, just let the buyer know in the comments section of the listing.
Listings sold is just a fun one because this shows exactly how much you’ve made off of selling your old stuff! Cool, right? This definitely keeps me motivated.
Step 6: BEGIN!
Time to play love it or list it! Get your first items LISTED and start raking in the cash. Have fun, make money, maybe buy some things… No downside!
Want to follow my Poshmark? You can find me @hannahhlee94. I look forward to connecting with you!
